


Using a VPN service on your phone has become commonplace to access content on different streaming services that may be geo-blocked according to different licensing agreements from big service providers such as Disney, Netflix, HBO and Hulu to name a few.
Introduction
To install a VPN on your phone is relatively easy and can often be a very smooth process, with many services using multiple servers in different countries so different restrictions can be worked around. A common example of this is US Netflix subscribers using a VPN in order to access the hit show “The Office” – which is available in the UK as of earlier this year. But the purpose of this article is to apply this scenario to Apple TV, meaning you can use all your favorite apps with minimal restrictions on the big screen!
What is a VPN?
A VPN stands for Virtual Private Network – meaning that all network information between the device connected to the VPN and the end server are kept secure and encrypted, as if on a private network. This also allows for the servers that one may be connecting to be in different locations. Popular locations include United Kingdom, Brazil and Canada which users can access content that is sometimes blocked in the United States.
How you can use a VPN on Apple TV
There are 2 different methods for getting a VPN on AppleTV consisting of: Using a Virtual Router with a hotspot device or using a Smart DNS setting on AppleTV. Each of these options come with various levels of difficulty and setup, but we’ll detail each one below to help you get setup as soon as possible!
Easy: Using a Smart DNS
Smart DNS settings can be applied in different ways depending on which VPN provider you use. In this article, we will be using Surfshark as an example.
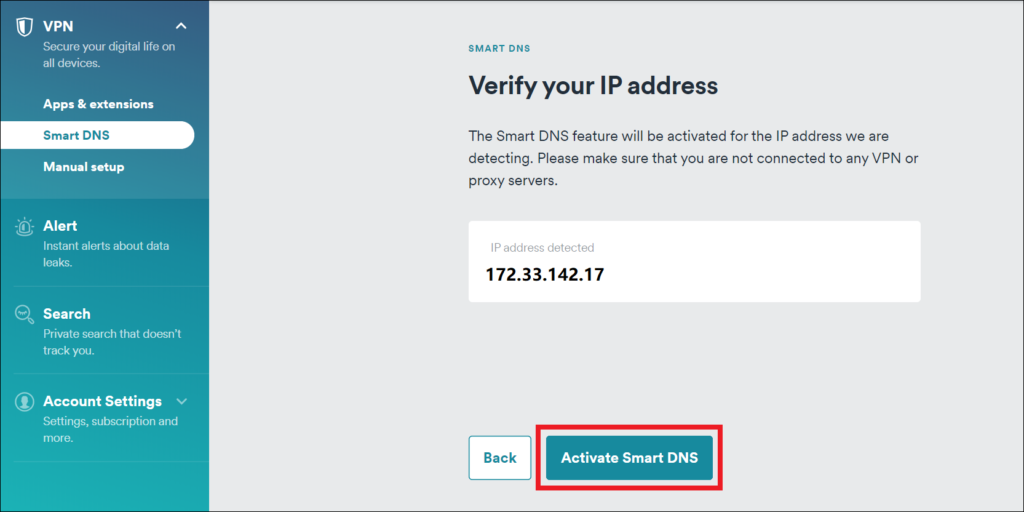
- Visit the Smart DNS section of the VPN page. (If you are having issues, see here.)
- Click the blue button “Activate Smart DNS”
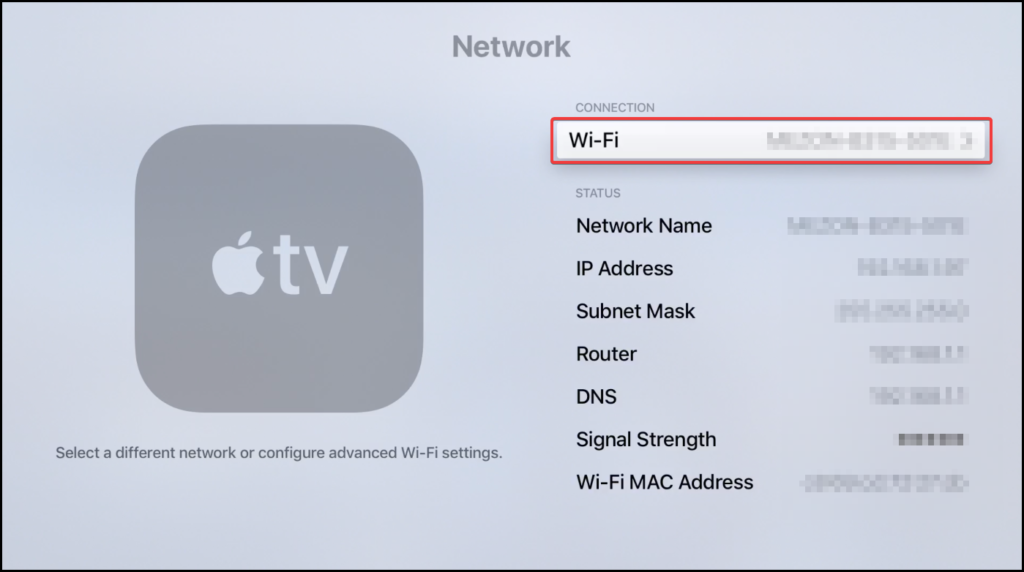
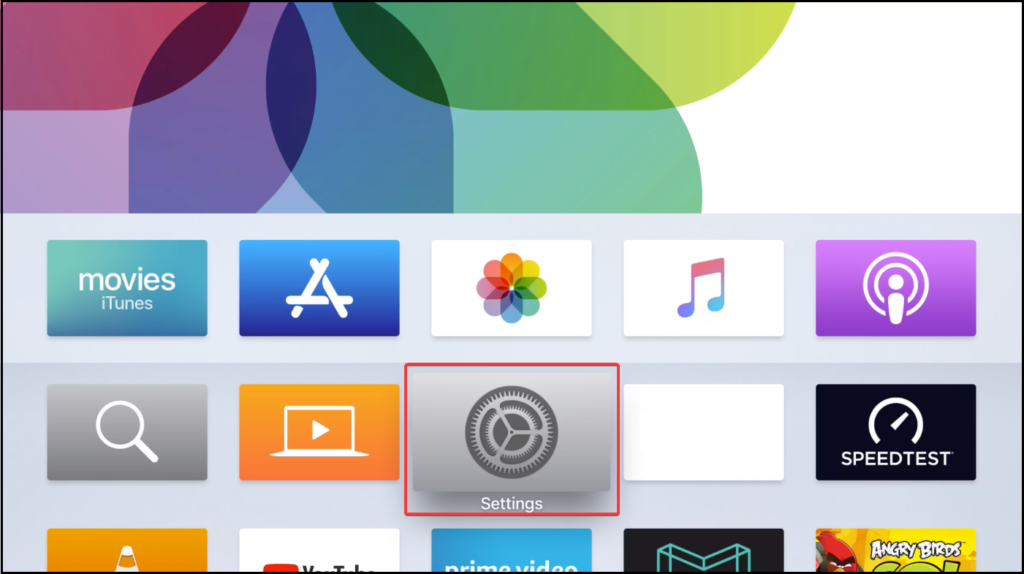
- Now, on your Apple TV, go to “Settings” > “Network”
- Select your network & select “Wi-Fi”
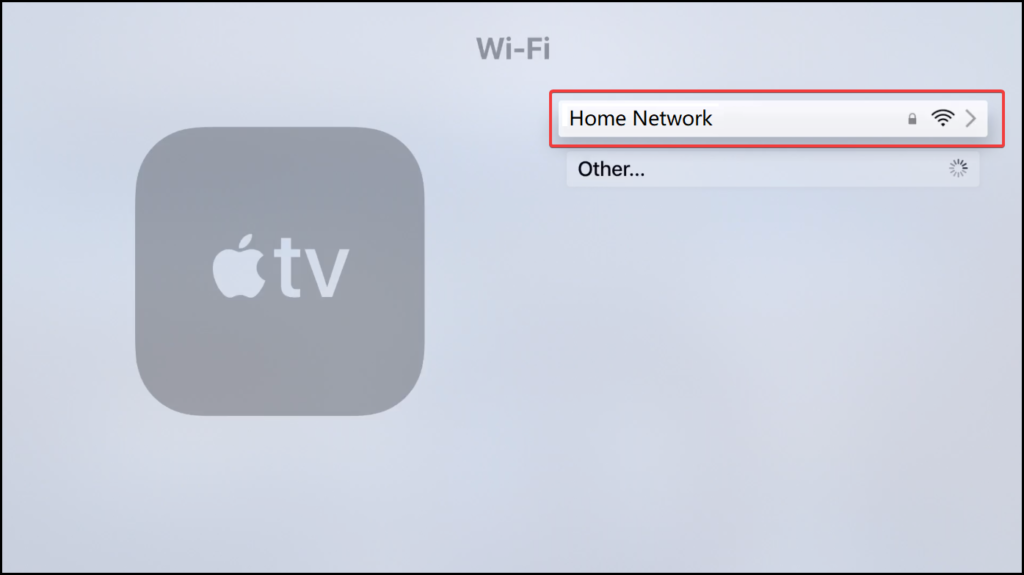
- Find your network and choose it
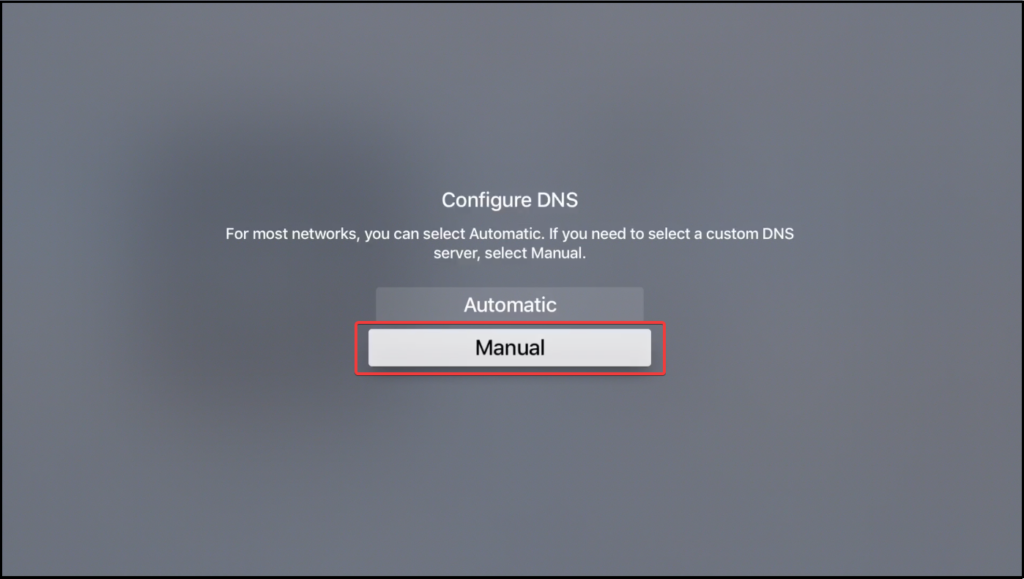
- Click “Configure DNS” and choose “Manual”
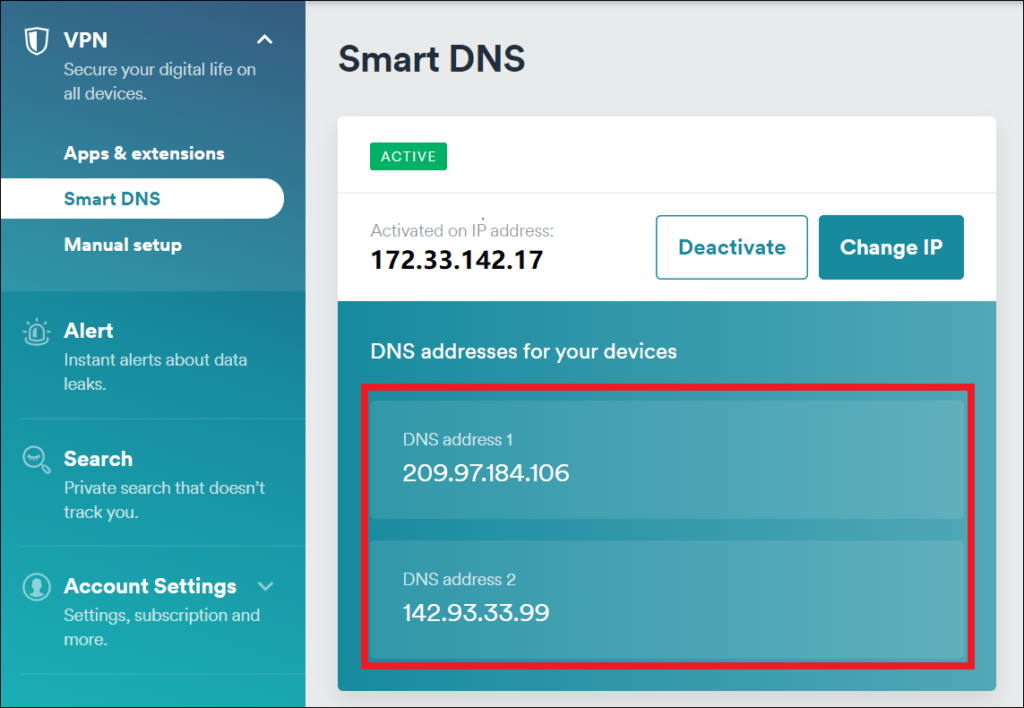
- Enter one of the two Smart DNS addresses you received
- Confirm all changes and return to the main settings menu
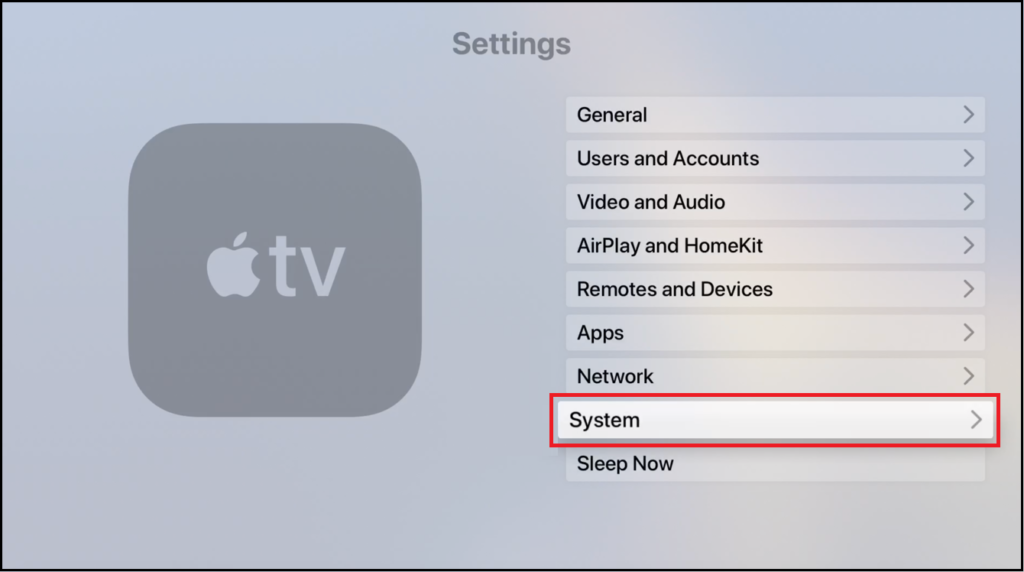
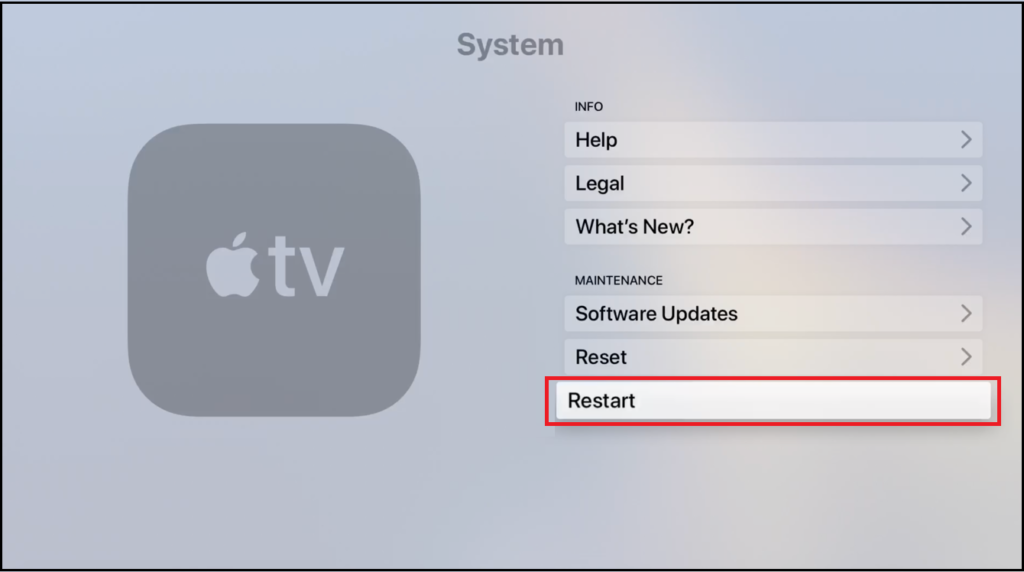
- Select “System” > “Restart”
View the gallery below with images of the instructions listed above:


Medium: Using a Virtual Router with a Hotspot Device
Option A: With a phone
- Using a phone, you can download a VPN such as the aforementioned Surfshark VPN or any of the leading industry VPNs. Install it to your phone and complete the signup and subscription setups (if applicable)
- Choose your VPN’s location and activate it on your phone
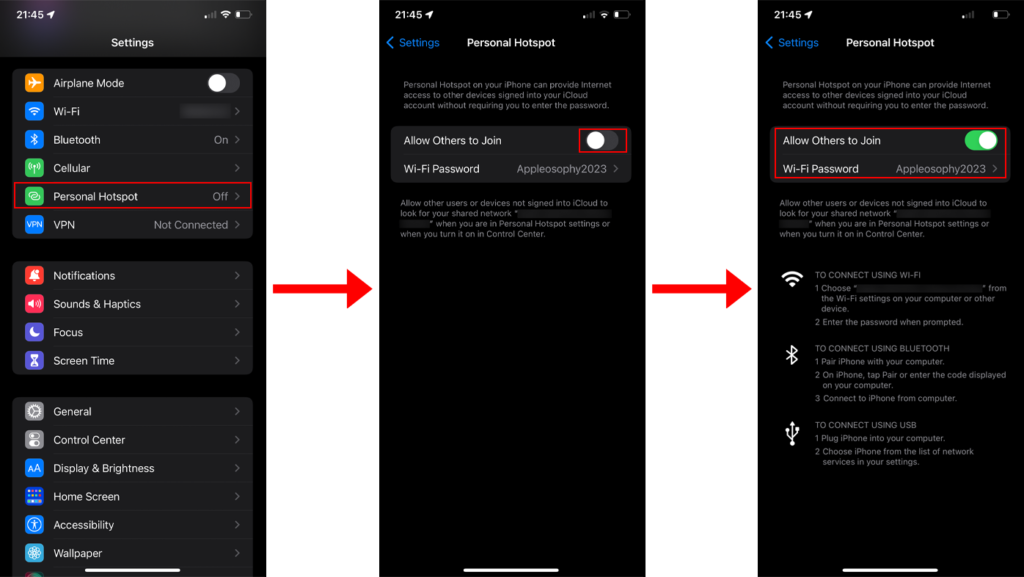
- Go to “Settings” > “Personal Hotspot” and switch it on
- Now, on your Apple TV, go to “Settings” > “Network”
- Select your network from the “Wi-Fi” connections list
- Connect to it & wait for the green connection icon to show on your iPhone or cellular iPad
- Once showing, everything is complete! Your connection is routed through your phone and then through the VPN, meaning you can manipulate the location as will!
Notie: Despite this being arguably easier than Option B, you may incur extra charges based on your cellular data allowance and ability to use the personal hotspot feature. Check with your carrier before trying this method.
Option B: With a laptop/desktop
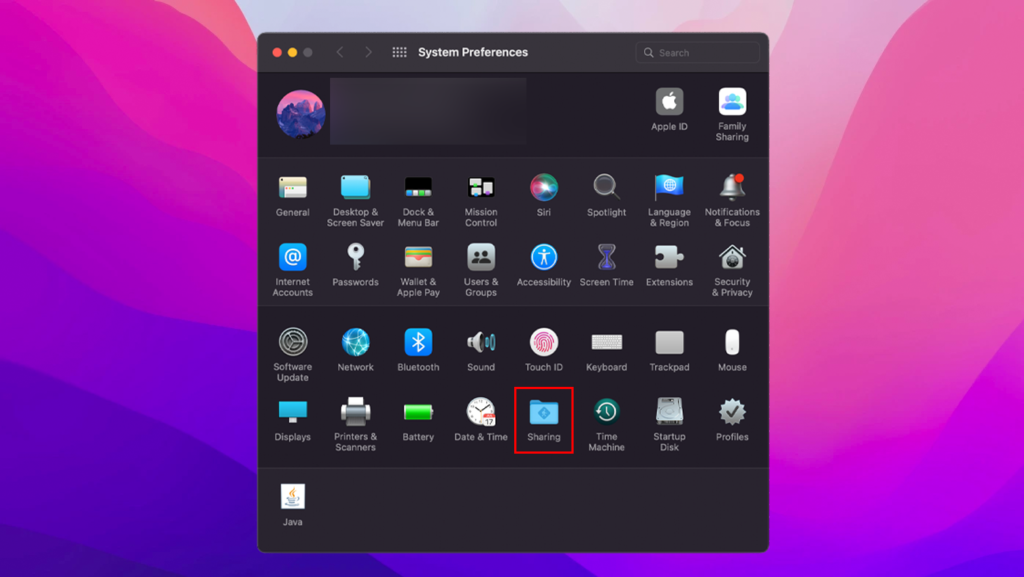
- Using a MacBook laptop or an iMac desktop can be used for this service and requires you to have VPN software installed and configured on your computer
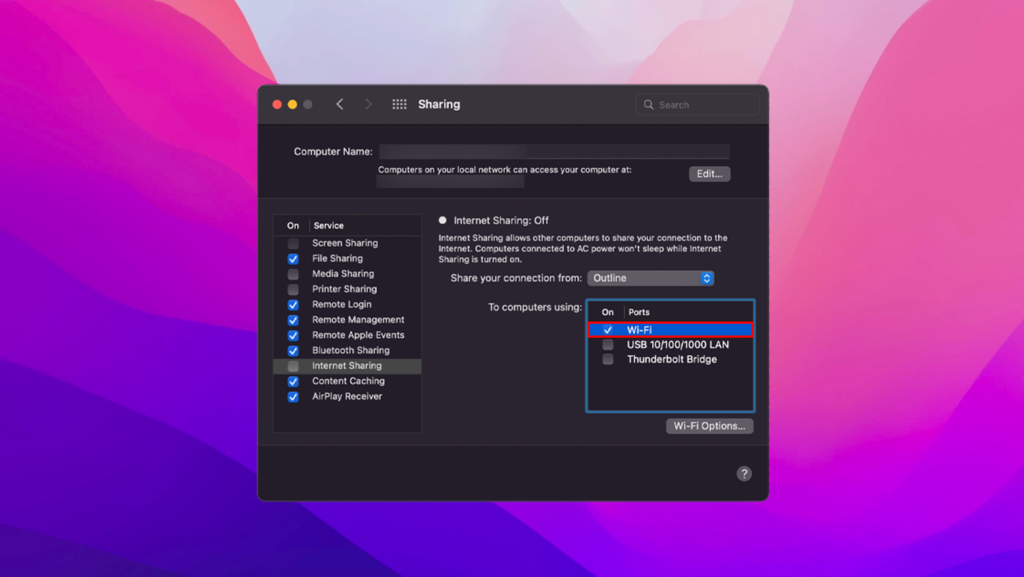
- Navigate to “Settings” and then look for an icon for “Sharing”
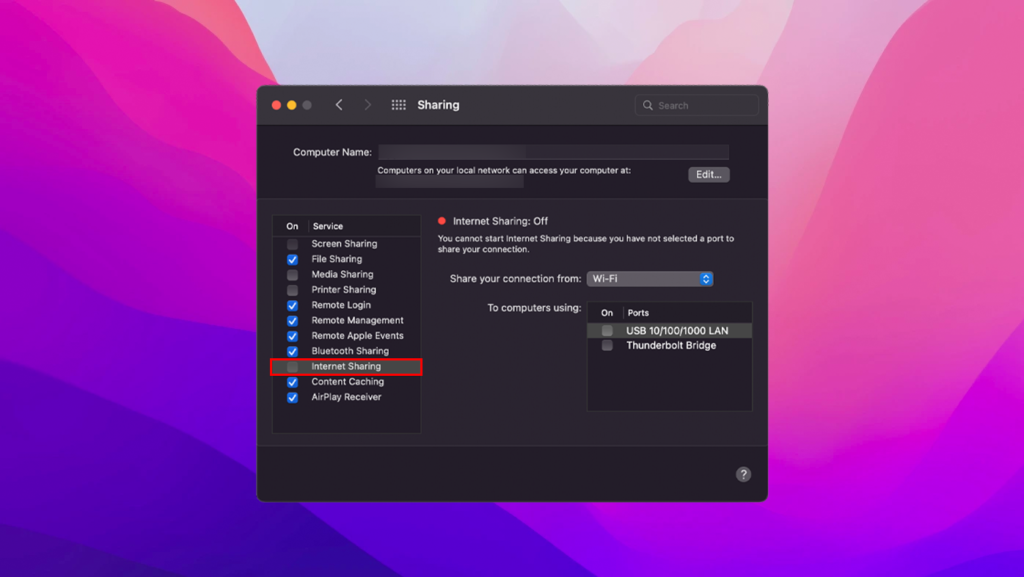
- Under the checkbox list, select “Internet Sharing”. The window should update with information about internet sharing
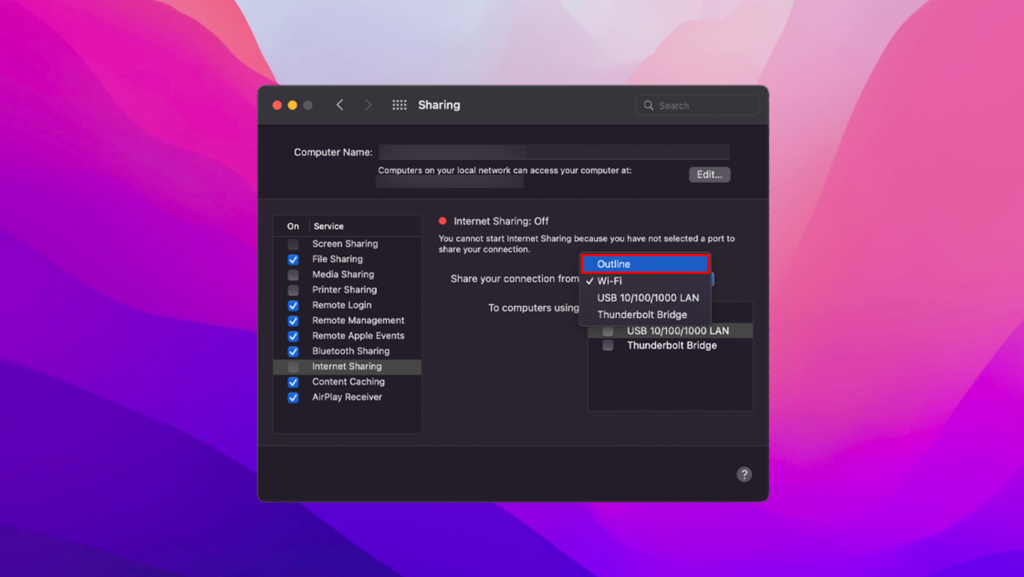
- Under “Share your connection from” click your VPN service provider’s connection. We’ve chosen to use “Outline” for this example
- Once confirmed, under “To computer using:”, select the “Wi-Fi” option
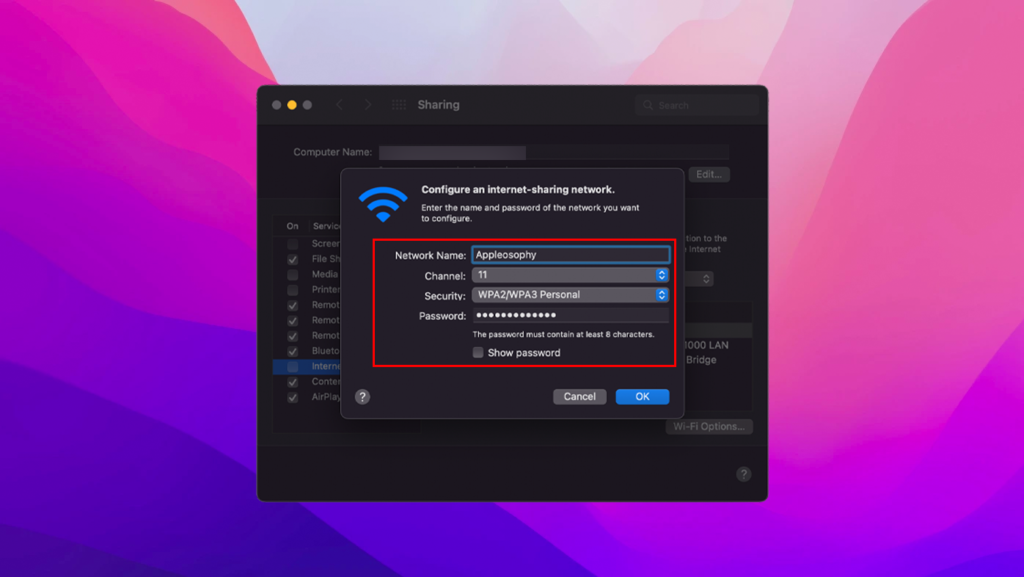
- This will bring up a similar window to on iPhone, asking you for the connection details such as Name, Channel, Security Type and Password
- Feel free to set a custom name and password, but keep the channel and security as default (You can always come back and change the security settings later)
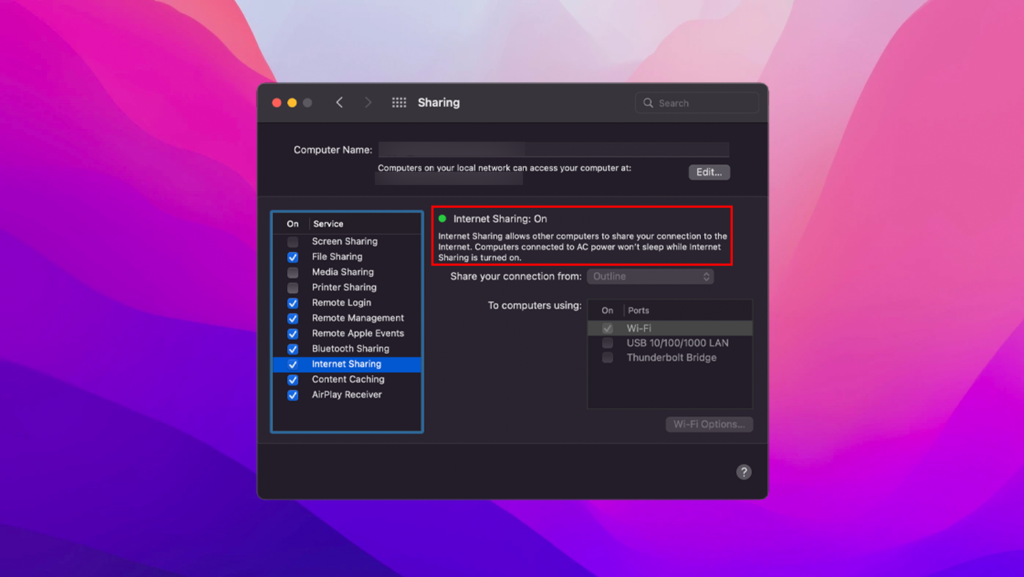
- Click “Okay” and then your laptop hotspot is now live!
- Now, on your Apple TV, go to “Settings” > “Network”
- Select your network from the “Wi-Fi” connections list
- Connect to it and everything is now complete! Your connection is routed through your computer and then through the VPN allowing you to work around content barriers in your location. A Windows version of this part of the guide can be found here.
Note: Some computers use cellular connections, meaning you could be charged for this method. Check with your carrier before trying this.
Hard: Setting a VPN on your router
Whilst this isn’t mentioned in our initial list, it is possible that some routers support the installing of VPNs within their admin interface. The process for installing and setting the VPN up is slightly more laborious than the other options and would require a tech-savy individual(s) to configure correctly. In the event that your router does not support VPNs, you can also do custom device changes in order to make this happen. You can follow Surfshark’s helpful guide here, but you can also find various other guides on YouTube which may help visually describe how to get things working.
This option is the least recommended by our team for easy internet users, but for those sure of their technical know-how, it may be more sustainable in the long term as a VPN installed on the router will encrypt all traffic from every device connected to it, as opposed to just the devices with VPNs installed on them natively.
Conclusion
With the power of a VPN on your Apple TV, you really can access anything you want (just as long as it’s not illegal). Getting around geographical restrictions is usually a great feat for devices other than a phone, tablet or computer and with this guide, we hope that it means that you can access the shows, movies and music you want to without hassle.
With this being said, make sure you use a VPN for safe browsing as even though the connection is encrypted to a certain degree, it has also been noted that some security flaws can still let identifiable information be known if certain settings are not activated. We recommend choosing a secure VPN service and also updating all your software and apps in order to stay ahead of any security exploits.


