How you can take your own passport photo on iPhone. Now we all can take our own passport photo on iPhone or iPad easily and at no cost. The trick to taking your own passport photo, or any ID photo, is that the image must comply with official standards, needs to be a specific size and have specific margins, and it should be stored in a file type that you can use to upload online or print. In this guide, I’ll walk you through the entire process in a nutshell so that you can eliminate the possibility of mistakes and have everything right from the start.
What You Will Need
Before you start, you need to ensure you have a few basic things in place. You don’t need a professional camera, studio lights, or special editing skills. For the majority of people, all you need is an iPhone, a white background, and a few minutes of setup to take your passport photo at home.
First, you will need an iPhone with a camera. Any recent model should suffice as long as the picture is not out of focus. Having a newer iPhone can provide a better quality photo, but the most important thing is good lighting and positioning, not that you have the most expensive phone. You will also require a plain white or cream background. This is the most critical part of the procedure. A blank wall is generally the simplest choice. If you don’t have a fully clean wall or you see texture, go ahead and use a smooth white backdrop instead, but keep it simple. Busy patterns, furniture, decorations, shadows, or coloured surfaces can interfere later on.
Lighting is just as important as the background. Use soft, uniform light, preferably indoors during the day with ample light from a window. Natural light is always the best and easiest lighting option because it makes your skin tone look normal and minimizes harsh shadows. Don’t take photos in a very dark room, with yellow or orange overhead light, or in direct sunlight where it shines on one side of your face. Passport photos are supposed to be neutral and in focus, not dramatic or glammed up.
You also need to think about how the picture is taken. Here are two great options:
- Get someone else to take the picture for you.
- Place your iPhone on a solid surface or tripod and use a timer.
It’s often better to have someone else help you than to take a selfie. It is easier to maintain the correct height and distance of the phone, and the finished photo looks more like a real passport photo instead of a casual snap from your phone.
Then, you can think about what kind of output you really want. A typical passport photo can be:
- A digital passport photo for an electronic application or renewal
- A print-ready passport photo if you want to print the photo and mail a hard copy
That’s important to know because the final product could look a little different. One option gives you a file to upload. Another gives you a photo sheet to print out. Some people want both, so it’s good to know before you start.
And it is always better to have the correct clothes on from the beginning. Wear normal everyday clothes in a solid colour that contrasts with the background. A white shirt on a white wall can make your picture look a little washed out. Extremely bright patterns, uniforms, or anything that is similar in color to the background can confuse the scanner.
And finally, be prepared to take more than one picture. Although the first photo looks good to the eye, a minor imperfection such as soft focus, uneven shadows, head tilt, or a smile can disqualify it. You are more likely to end up with a good photo if you take a few versions rather than have to do everything again.
Once you have your iPhone, background, lighting, and setup, the rest is easy. Then you will need to select the specific type of passport photo you require, as this will determine the way you capture, edit, and store the final photo.
Step 1: Select the Type of Passport Photo You Require
Prior to downloading an application or taking any pictures, it is a good idea to understand what type of passport photo you require. It sounds straightforward, but it influences every stage of the process, from how you crop the picture, to what file you save it as, to whether you need a digital copy or a printed one, or both.
Many first-time users think a passport photo is one-size-fits-all. Actually, requirements may differ based on the way you are going to file your application. There are people filing applications online who want a digital file to upload for their application. Some are sending in paper forms or going for an appointment and require a printed photo that meets the specifications. If you are confused about which one to take, you are much more likely to make a mistake at first and realize it later.
If you are making a U.S. passport photo, the size of the photograph should be 2 x 2 inches. That’s the format most everyone thinks of when they hear passport photo. But even when the final photo size is standard, how you use it may vary. For instance, a digital passport photo for online use may have to comply with file specifications, while a printed passport photo has to be clear and correctly aligned on photo paper.
That is why the first choice should be one of these:
- I need a digital passport photo to submit online
- I require a printable passport photo for a paper application
- I need both
And if you are not sure yet, selecting both is the best choice in most cases. It’s convenient and can save time if you later change your method of applying or find that you need a printed paper backup.
You might also want to think about the type of document. A few users will look for a solution for an iOS passport photo when what they really require is a visa photo, or a photo for their green card, ID, or another document. Some of those photos may look a lot alike, but the rules don’t always match up. Size, cropping, head position, distance from the camera, background color, background texture, lighting, reflections, shadows, glasses rules, and head covering rules may all differ.
So it’s worth answering three quick questions before you move on:
- What is the document I am applying for?
- Is this for the United States or another country?
- Should I order a digital file, a print sheet, or both?
Once you have those answers, everything else is a lot easier. You don’t have to guess anymore. You are photographing for a known purpose, which makes it easier to decide which settings to use and whether you need to take more photos.
Timing is also helpful to remember. Passport photos are supposed to look like the person you are now, not some image you have been holding on to for an extended period of time. And even if you do happen to have a great portrait in your camera roll, that photo might not be the right one if it doesn’t represent how you look now or if it was snapped in casual lighting using an unsuitable background. Starting over is generally best.
You don’t need to worry about cropping or any technical corrections at this point. The purpose here is just to establish the target. After you’ve identified the type of document and the output you want, you can now go to the next step: get the app on your iPhone and get it right from the beginning.
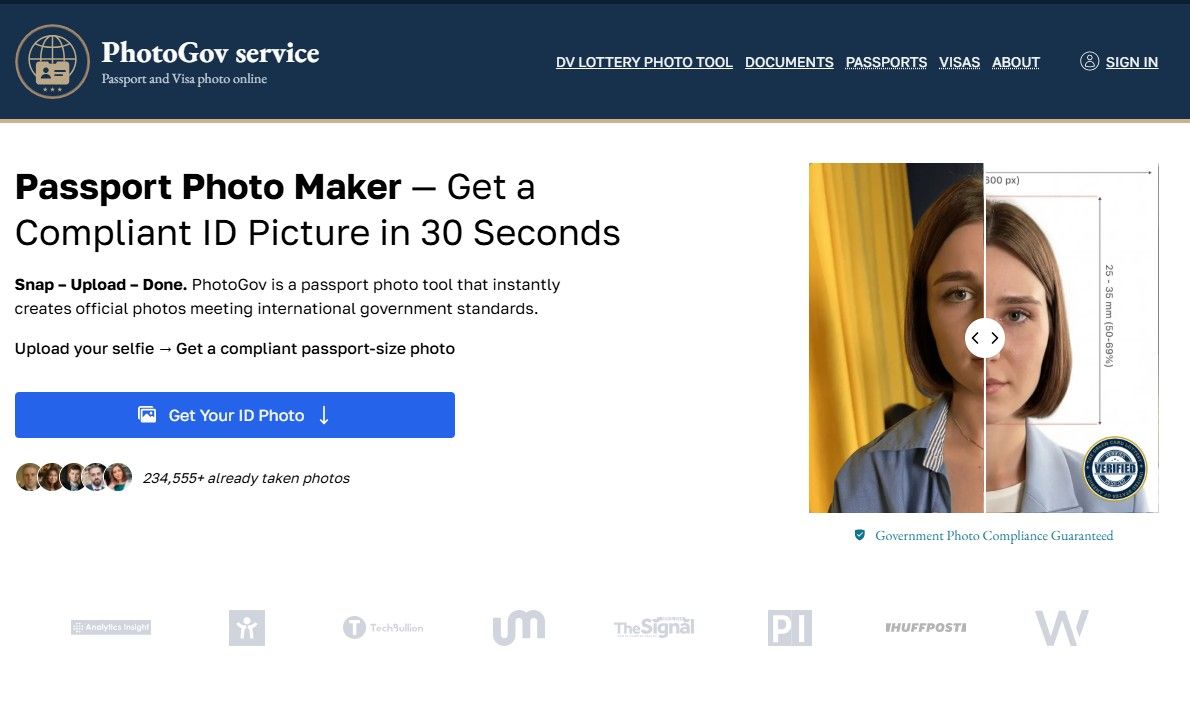
Step 2: Download PhotoGov on Your iPhone and Get Set Up
On your iPhone, go to the App Store to download PhotoGov. When you know the required passport photo type, then it is time to install the tool and use it on your device. This step should be straightforward, but a number of guides skip over it too quickly. This is the part that first-time users need to set up for a smooth experience overall.
To start, unlock your iPhone and tap on the App Store. Tap the search tab, then type in the app name exactly as given below. Be sure to get the original PhotoGov iOS app, otherwise you may end up with a similarly named application that has fewer features or is more confusing to use. When you find it, tap Get and wait for the download to finish.
Once installed, launch the app and go through the first setup screens. Most passport photo apps will require a couple of permissions upfront. The essential ones are usually:
- Camera access
- Access to your photo library
These are crucial permissions since you may want to take a new photo inside the app or use a photo you’ve previously taken on your iPhone. If you accidentally deny access, the app might still open, but a couple of essential functions might not work properly until you return to your iPhone settings and switch them on.
When you are in, you’ll want to take a moment to select the right type of document. This is one of the easiest places to slip up. Don’t just tap the first result that looks close enough. A U.S. passport photo, visa photo, and ID photo may differ in standard, so it is recommended to select the specific document at the beginning instead of correcting the settings later.
The app might at this point ask you whether you want to:
- Take a new photo now
- Upload a photo from your library
If you haven’t taken the photo yet, for best results it’s usually best to take a new photo after reviewing the requirements in the following step. If you have already taken a few clear test photos in good lighting on a plain background, you can pick one now from your Camera Roll to upload later.
Take one more minute to familiarize yourself with the basic view of the app. You don’t have to dive into every feature, but it’s helpful to know where the important buttons are. In most cases, you ought to be able to spot:
- The document selection area
- The camera or upload button
- The crop or adjust window
- The Save/Export option
This brief pause can prevent extra work later on. Instead of getting lost in the interface, you will know exactly where to go when your photo is done.
One good practice here is not to assume the app will fix everything for you. You’re still supposed to focus on the picture, even if the workflow is guided. A bad source image can still lead to problems down the line, even in a well-thought-out app. That’s why setup is more than just install and tap through. It’s install, choose the correct document, and be prepared to follow the requirements properly.
After completion of this step, your iPhone should be ready, you’ve installed the application, and you’ve selected your document type. The moment has come for the most important part of the procedure: reading the official U.S. passport photo specifications before you take or upload any pictures.
Step 3: Confirm You’re Following the Official U.S. Passport Photo Guidelines Prior to Taking the Photo
Wait a minute before you take or upload anything. This is the step that makes the biggest difference. A passport photo can look fine to you and still get flagged because the question is not whether it looks nice, but whether it complies exactly with the official U.S. rules.
The U.S. Department of State states the photo must be in color and taken within the last six months, and must be a clear image of your face. It cannot be blurry, grainy, pixelated, or manipulated with filters or other alterations.
The most fundamental rule is the size. A U.S. passport photo size is 2 x 2 inches (51 mm x 51 mm). Your head must also be positioned correctly within the frame. It should be about 1 inch to 1 3/8 inches from the bottom of your chin to the top of your head. In digital terms, the State Department also provides head-position guidance so the face appears in the correct area of the square image rather than being too close or too far away.
The background is equally important. It should be solid white or cream coloured, with no shadows, textures, or lines, and there shouldn’t be any objects behind you. You should be looking straight at the camera and showing your full face. You should have a neutral expression, both eyes open, and your mouth closed. This is where a lot of people go wrong unintentionally. A slight tilt of the head, a soft smile, or uneven lighting may seem minor, but those details may cause the picture to fall outside the standard.
⚠️ Important: Don’t wear glasses unless you absolutely qualify for a medical exception. Eyeglass frames are not permitted in standard U.S. passport photos under current rules, and sunglasses or tinted glasses aren’t allowed either. Also avoid hats, uniforms, camouflage, and anything that covers part of your face or head unless it’s for religious or medical purposes and you have supporting documentation.
If you want to renew online, digital file rules apply too. The image to upload should be a JPG, PNG, HEIC, or HEIF file, and the file size needs to be from 54 KB up to 10 MB. The State Department also recommends standing a few feet away from a white wall or background, keeping your shoulders in the frame, and allowing a little extra space around your face so the image can be cropped appropriately when you’re uploading it.
This step is worth paying attention to since a lot of rejected photos fail for very simple reasons: bad lighting, the wrong background, a face that’s too zoomed in or out, airbrushing, or a casual pose that doesn’t match the official one. When you know your target specifically, everything else is a lot easier. So you’re not guessing at what looks right. You’re working toward a particular, official format.
Next, that’s exactly what you are going to do: arrange the background, lighting, and composition so the iPhone picture you take has an excellent chance of being good on the very first try.
Step 4: Photograph with the Appropriate Background, Lighting, and Composition
It’s time to take the picture now that you know the rules. This is the step that people tend to skip over, but what most don’t realize is that the original photo is important. A good crop will never rescue you from a photo with shadows, bad framing, wrong expression, or a busy background.
The objective is clear: snap a crisp, clear photo that already looks like the real thing before uploading it.
Choose a Plain Background
Start with the cleanest background you can find. A blank white wall generally is best. If your wall is not white, you can put a plain white sheet or blanket behind you.
Don’t stand too close to the wall. Leave a little space between you and the background. This helps minimize shadows and makes the background appear cleaner in the finished product.
Prefer Soft, Even Light
Lighting makes or breaks the photo. The safest bet is to use soft, diffused light, preferably natural light from a window. Try to stand where the light falls evenly on your face.
Common problems to watch out for:
- Overly bright lighting from overhead
- Direct sunlight on one side of your face
- A dim room that causes the photo to be grainy
- Shadows behind you or across your face
Your photo should appear natural and clean, neither too dark, too bright, nor too faded.
Stand and Face the Camera Straight
Your pose should be simple and straightforward. Look straight at the camera with your full face showing. Keep your head straight and keep both eyes open while looking at the camera lens.
You should have a neutral expression. Keep your mouth closed and don’t smile. The image should appear natural, but not too informal.
Get the Framing Right in the Shot
Make sure your shoulders are visible and your face is centered. When you take the photo, don’t zoom in too much. Leave a little room around your head and shoulders in case you need to crop the image later.
Too tight or awkward cropping can make a perfectly good photo more difficult to use.
Don’t Take a Selfie
If you can, have someone else take your photo. This normally leads to far better outcomes than holding the phone in your hands. The angle is more natural and the camera is easier to keep steady and centered.
When help is unavailable, set your iPhone on a flat surface or a tripod and use a timer. The key is to keep the phone still and take the photo straight on, not from above or at arm’s length.
Take Multiple Versions
Don’t trust just one shot. Take multiple shots and review them.
That way you’ll have options in case one of the images has:
- Uneven lighting
- A slight head tilt
- Soft focus
- A shadow in the background
- Tight cropping
Even minor problems can make a difference, so it’s best to have a few good options.
Keep the Photo Natural
Remove anything that takes attention away from your face. Take off your glasses, hats, headphones, or anything that obstructs your features. If needed, pull your hair away from your eyes.
Resist the urge to apply beauty filters, portrait blur, or extensive editing. Your photo should reflect what you really look like, not a retouched or stylized image.
What You Should Have at the End of This Step
By now you should have a few clear photos on your iPhone with:
- A plain white or off-white background
- Even lighting
- The right face position, even if it doesn’t need to be perfect yet
- A neutral facial expression
- Some padding for cropping
That is all you need for the next step. When you have a good source image, you can upload it and use the crop, background, and output controls to create a valid passport photo.
Step 5: Upload Your Photo and Customize Its Crop, Background, and Output
After you took some good shots with your iPhone, pick the best one and upload it to PhotoGov. You’re not trying to repair a bad photo at this point. You are just modifying a good one so it fits the correct passport template.
This mindset is important, because the best results are obtained when you start with a photo that has appropriate lighting, a solid background, and correct face orientation. For the U.S. passport, PhotoGov’s own guidance comes into play in a significant way: because some countries do not allow digital modifications to passport photos, including the U.S., the company sticks to cropping and sizing and doesn’t use automatic background replacement.
Choose Your Best Original Photo
Now, before you upload anything, look at the versions you shot and pick the one that’s already closest to being compliant.
Search for a photo that has:
- Good lighting on the face
- No shadows behind you
- A neutral expression
- A straight head position
- Enough head and shoulder room
- Good sharpness
If one image has better lighting and another has better composition, go with the one that is better overall. Generally, it is easier to start with a clean and natural image that needs only slight adjustment than with an image that is already distorted.
Upload Your Photo and Check the Framing
When you upload the photo, be sure to look closely at the crop. This is when it all really matters. Your face should not be too big, too small, too high, or too low in the square frame.
For U.S. online renewal, applicants may reposition or crop the photograph in the uploader, which also performs a basic check for compliance. Still, a staff member will take a second look at the photo, so it’s not automatic that it will be accepted. That’s why you want to have the framing as close to right as you can get it before you go to the government portal.
When looking at the crop, make sure that:
- The whole head is visible
- The face is centered
- The shoulders are included naturally
- There isn’t too much empty space
- The crop doesn’t feel too tight, cramped, or awkward
A passport photo should be well composed and formal, not something that looks like a social media profile picture or a phone selfie.
Be Cautious When Adjusting the Background
Here is where most users expect the app to perform magic, but it’s better to stay realistic. If your original background was already white or off-white, you’re way ahead. When it comes to U.S. passport photos, the best policy is to use a compliant background right from the start, rather than rely on heavy correction later.
The State Department has strict requirements about a plain white or off-white background and does not allow edited or filtered images that alter the photo in unacceptable ways.
So when you look at the image, ask yourself one question: Can I still see a natural passport photo that was taken properly, or do I see an overly cleaned-up image that could raise concerns?
That is why a strong original image is so valuable. A little adjustment to presentation is one thing. Trying to salvage a terrible shot is quite another.
Review the Image Like a First-Time Reviewer Would
Don’t simply look at the preview and assume that it looks fine. Slow down and look at it as if you are evaluating someone else’s application.
Check for:
- Rough edges around hair or shoulders
- Odd brightness shifts
- Remaining shadows
- Patches in the background
- Softened or altered facial features
- A crop that is too tight at the head or shoulders
It’s the little things that people don’t always notice. What looks good on a phone screen when you’re in a rush can be underwhelming when viewed in a formal upload platform.
Make the Necessary Corrections for Your Desired Result
Now you want to keep your end result in mind. Some people want a digital file so that they can submit online. Others want a print-ready file so that they can fill out a physical form or have a backup copy. PhotoGov’s output can be both digital and printable, which is great if you want the flexibility of having a hard copy when the photo is done.
That doesn’t mean you should skim through this step. The crop and visual inspection still come first. The output is the final packaging. The key here is to make sure the image underneath is solid.
💡 Pro Tip: Leave yourself a backup option.
If the photo turned out well, you can save the digital version as well as a print version, if applicable. That gives you a little more flexibility if your application path changes or if you later find out you’d like to have a printed copy. It’s a little extra work, but it can save you from having to do everything over again.
What This Step Should Accomplish
After this step, you should be left with a single final image that:
- Looks natural and compliant with the rules
- Is cropped correctly
- Has a clean, simple background
- Keeps the face centered and easy to read
- Is ready to save in the format you need next
Now we come to the last practical step: how to save the file correctly, and whether you’re going to upload it, print it, or both.
Step 6: Save the Final File and Select Upload or Print
Now that your photo appears to be the right one, the last task is simple but essential: save the right file for how you intend to use it. Too many people make it all the way to the end and then realize that they saved the wrong format, selected the wrong file, or only have a version that works for printing, which is not the best for uploading online. That’s what this step helps you prevent.
Determine What You Will Do with the Photo
At this point you should know which of these applies to you:
- Digital upload only
- Printed passport photo only
- Both digital and print
If you are applying online, your primary concern is a clean digital file that conforms to the upload rules. If you are mailing a printed application, your primary concern is your print-ready version in the correct 2 x 2 format. Save both if you want to have options.
Download the Digital Version Properly
For U.S. adults renewing their passports online, the file you upload must be in one of these formats:
- JPG
- PNG
- HEIC
- HEIF
The file size must also be between 54 KB and 10 MB. Your photo should not be excessively compressed, nor should it be so large that it causes problems when uploaded.
When you download your digital passport photo, be sure to:
- Keep the image sharp
- Don’t take screenshots of the final photo
- Do not re-edit it with another app unless necessary
- Save the final file in a place where it can be easily found on your iPhone
A common mistake is to open the final image in another editor, export it again, and accidentally reduce the quality or otherwise alter the file in a way that causes new issues.
Save a Print-Ready Version, If Necessary
If you want a printed passport photo, save the print version as well. The idea is not just to have the same photo on your phone, but to have it in a form that makes printing easier and more reliable.
PhotoGov provides both digital results and printed products, so if you want to keep a backup option and print later, you can do that instead of trying to handle everything in one go.
Remember these basics when printing:
- The passport photograph must still be 2 x 2 inches
- The photo must be sharp and not blurry
- The printout should not look stretched or shrunk
- If you want to submit the printout, you should print on good photo paper
If you’re printing at home, make sure your print settings aren’t auto-scaling the image and altering its size.
Name and Save Your File Clearly
It sounds like a small thing, but it helps more than people expect. Don’t just leave the file with a generic name. Give it a name that lets you know exactly what it is.
For instance:
- passport-photo-digital
- passport-photo-print
- us-passport-photo-2026
So when you are uploading a document or sending a file to print, you’re not opening multiple similar images and wondering which one is right.
Give It a Final Check Before You Use It
Do a final check before you upload or print the photo. Make sure that:
- The face is centered
- The crop is well balanced
- The background is plain white or off-white
- The photo looks natural
- The image is sharp
- The correct file is selected
This final check only takes a few seconds, but it can prevent unnecessary delays.
Your End Result
By the end of this step, you should have:
- A single digital passport photo that you can upload, or
- A single print-quality image for you to print at home.